It’s been a while since I’ve updated with any new information about my project to build a 3:1 panoramic 35mm film camera. The project fell by the wayside for a few months as real-life got in the way, but recently I picked it up again, and redesigned the entirety of the front end to allow me to attach the 65mm Fujinon f/5.6 large format lens that I bought. I went with a simple design, essentially just attaching a hollow box to the front of the camera, and extending some of the existing vertical pieces for greater structural integrity.
I redesigned the back to fit around the added structure, and after some experimentation, added the rounded light seals above and below the back of the camera to help with light-tightness, a persistent challenge for me. The back fits around the camera like a nested box, and is lined with black felt for better light sealing.
To attach the lens, I made a lens board with a standard Copal #00 shutter hole in it. Attached to the front of the lens box, embedded within a few layers of plywood, are threaded nuts that permit the lens board to bolt on to the front of the camera, which gives me the very limited ability to adjust the focus in between rolls by adding or removing shims. I made a compact ground glass by sanding a small sheet of clear plastic, and I can place this where the film sits, and use a loupe to adjust the focus. It’s not perfect, but it gets the job done. For this version, I simply set the focus at around 15 meters, and stop down to achieve infinity focus.
With the design work done, I exported the parts to .dxf files and laid them out in preparation for laser cutting. I use the wonderful UW Comotion Makerspace for the laser cutting, and in 30 minutes, I had all the parts needed to start assembling the camera.
With the parts cut, I glued them together with wood glue, clamping the assembly overnight to let it dry. Once the parts were attached, I used Q-tips to apply filets of more wood glue on the inside corners, using a flashlight to check light tightness. I painted the inside with a few coats of matte black spraypaint, cut felt and foam for light seals in the back, and glued some black yarn along seams with Elmer’s for extra light tightness. I use lengths of dowel for the rewind and take-up spools. I epoxied nuts into the plywood for mounting the lens board and a 1/4-20 nut on the bottom functions as a tripod mount.
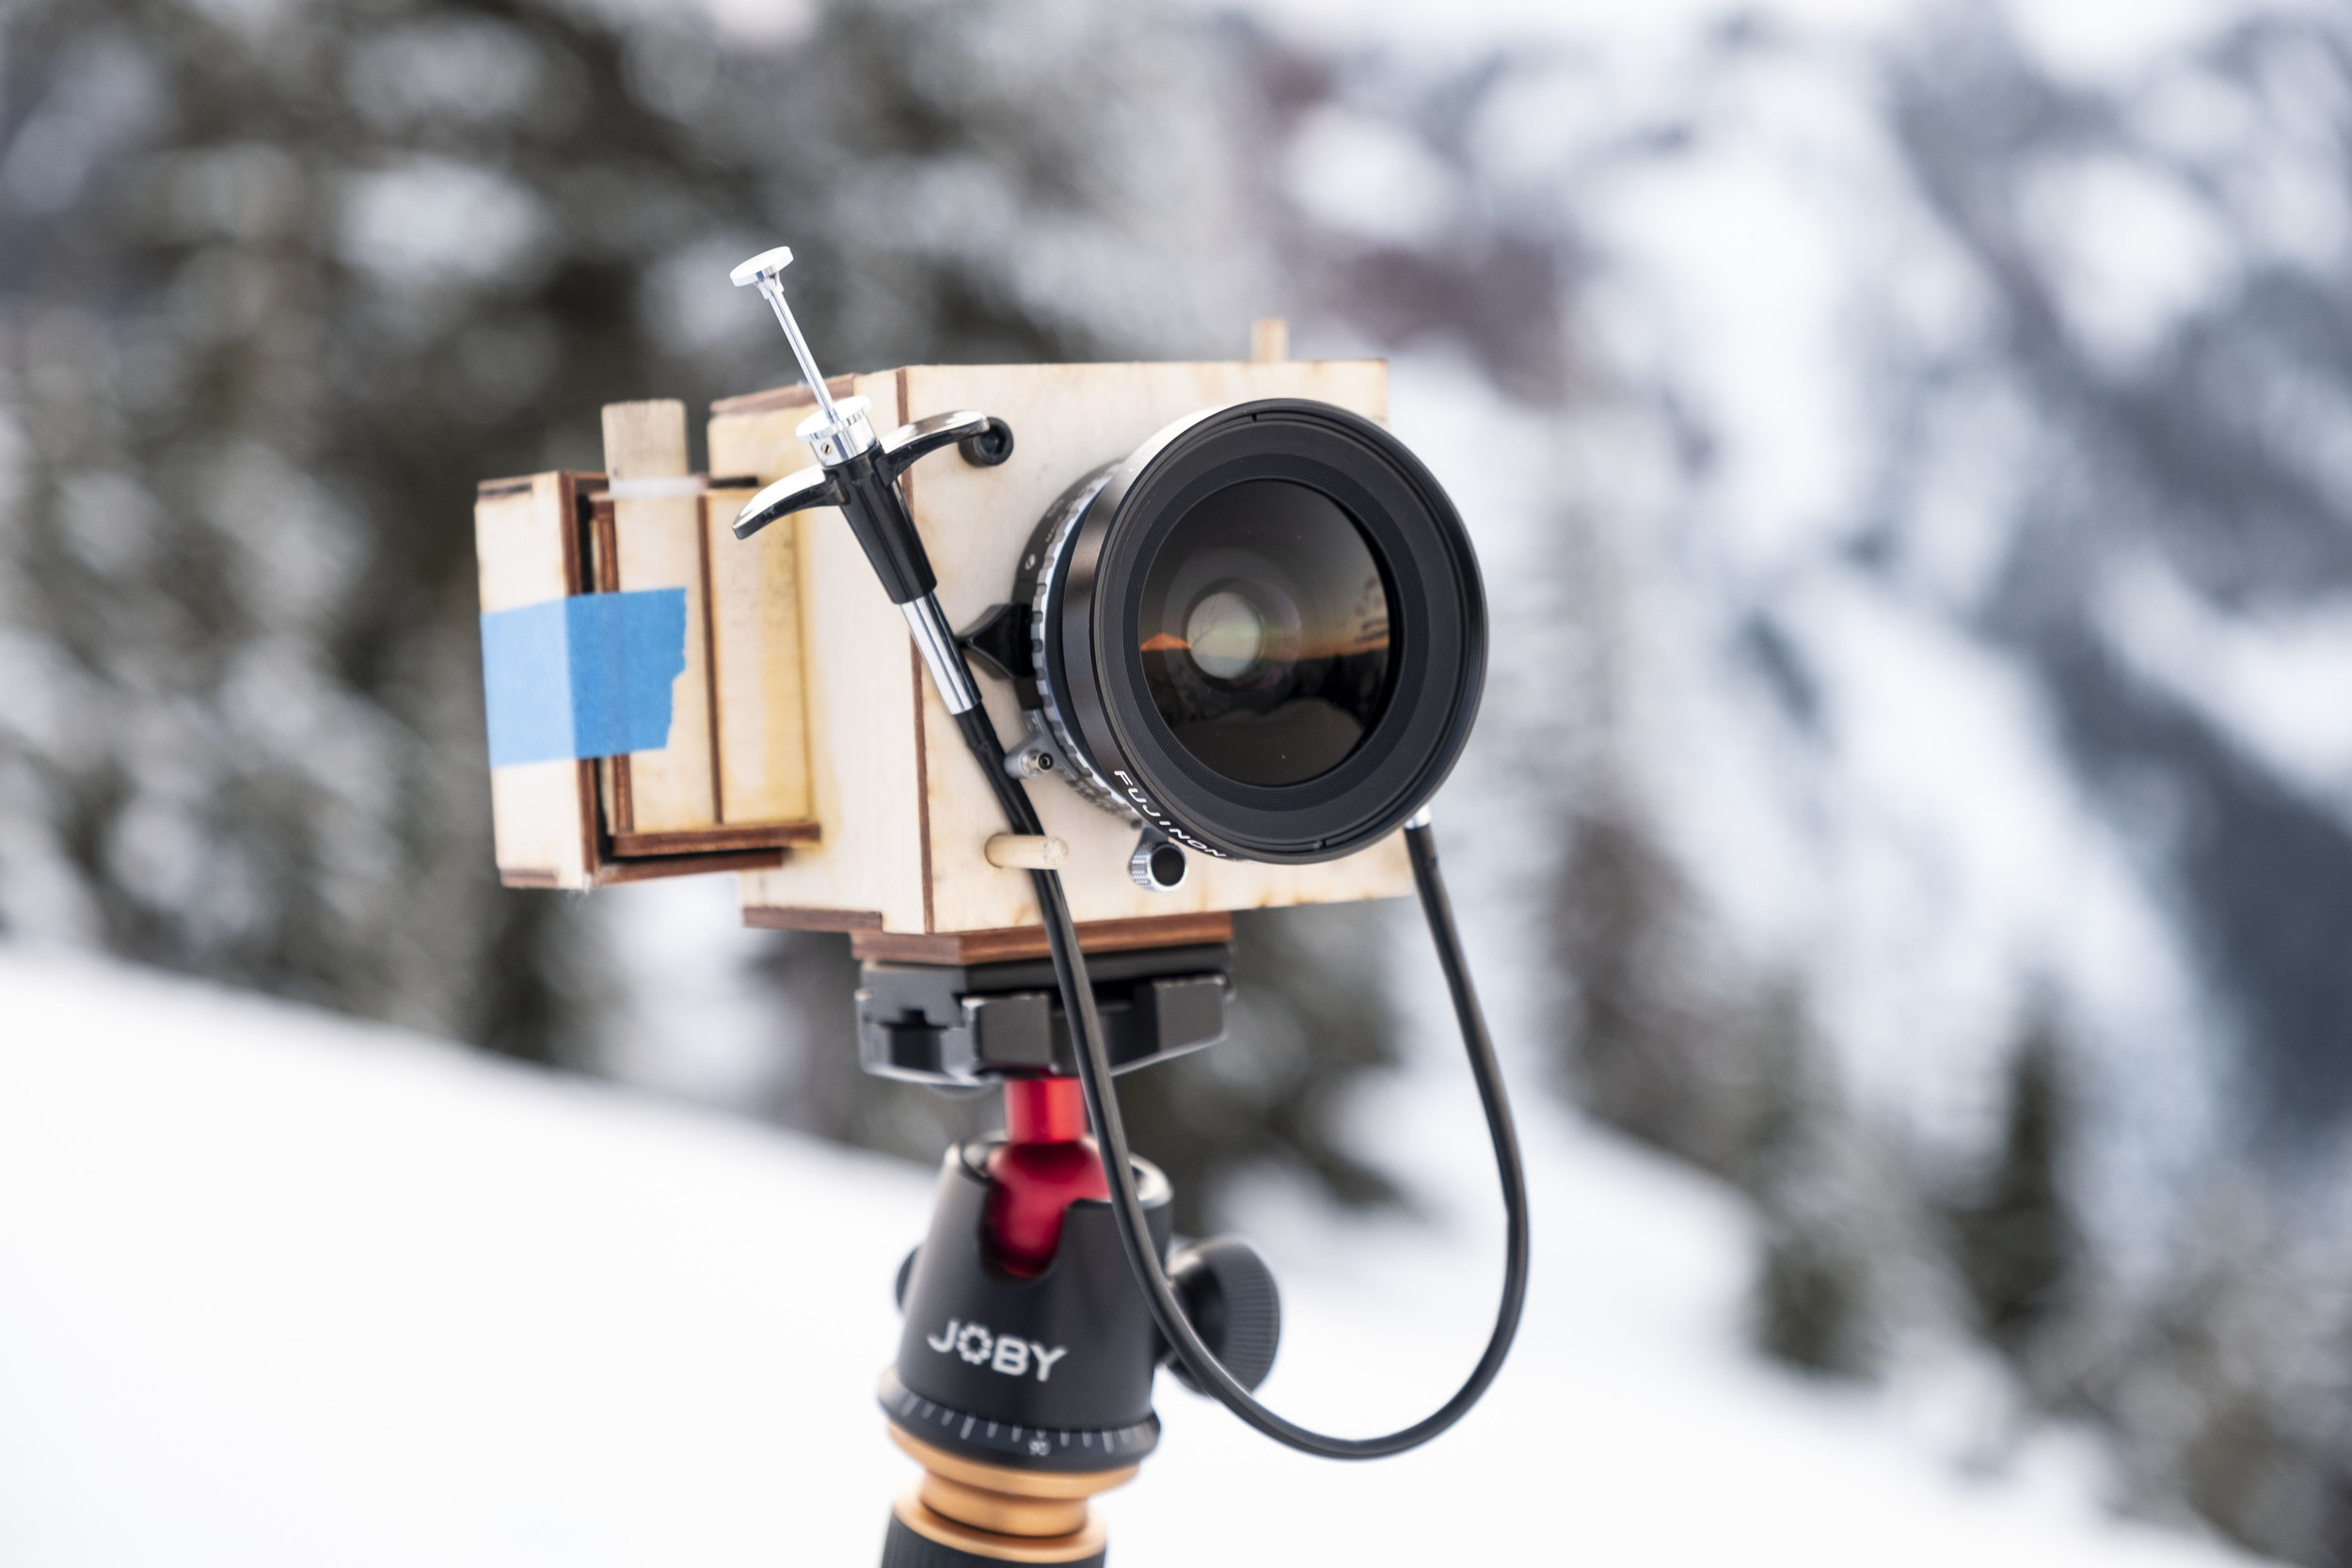
My homemade prototype out in the wild, at Mount Baker.
For a first test, I took the camera with me on a short ski-trip to Mount Baker, where I snapped a few frames on a roll of Fujicolor 200. In the field, two challenges became apparent. First, it’s difficult to compensate for increasing spacing between frames as the take-up reel increases in diameter. With some care, however, I can get 15 frames out of a 36 exposure roll!
The second challenge is composition - I don’t currently have a viewfinder, so I’ve adopted the “point-and-pray” composition technique. If it’s an important shot, maybe I’ll take a few frames aiming up and down, to get one that comes out. I swung by the excellent Shot on Film store in Lake City and found a used 35mm external optical viewfinder from an old camera, and soon I hope to add this to my camera and mask the viewfinder to the correct aspect ratio, using my fake ground glass to align the viewfinder and lens.
After I was finished at Baker, I took the exposed roll home and developed it, excited to see how the camera worked!
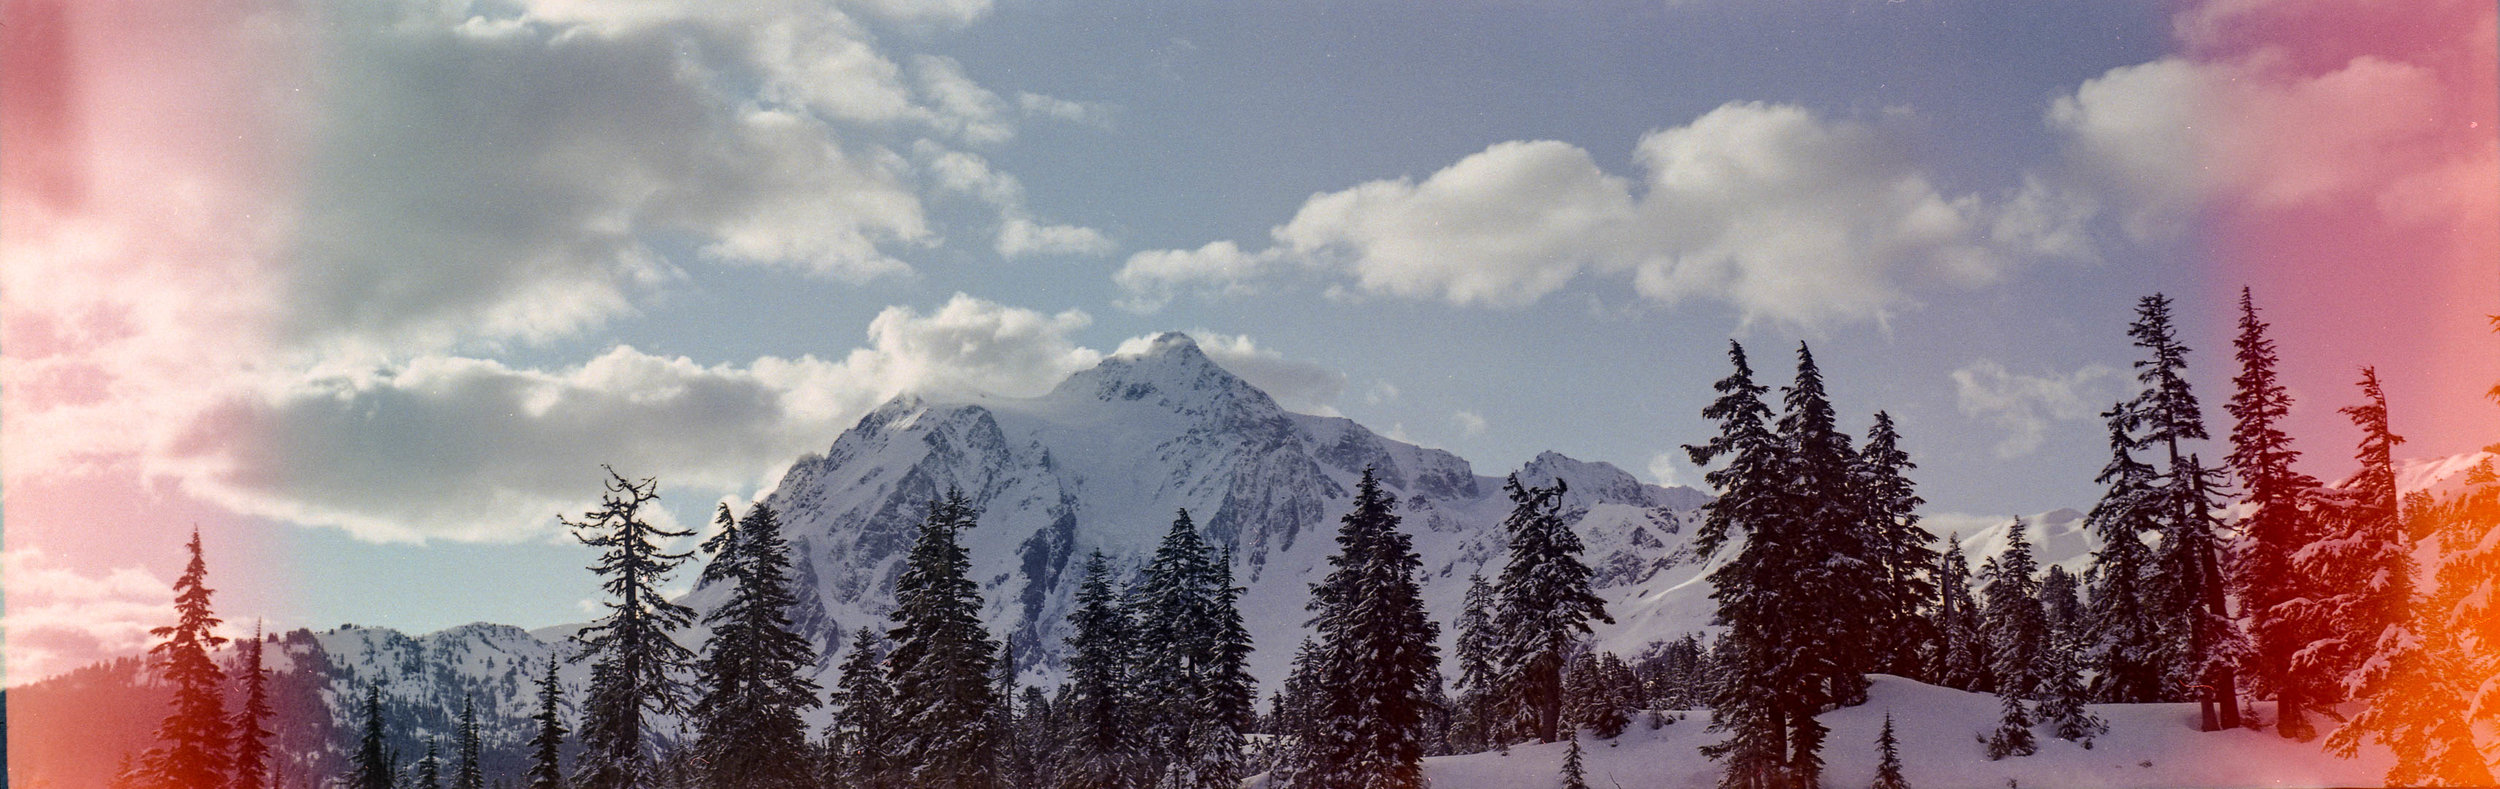
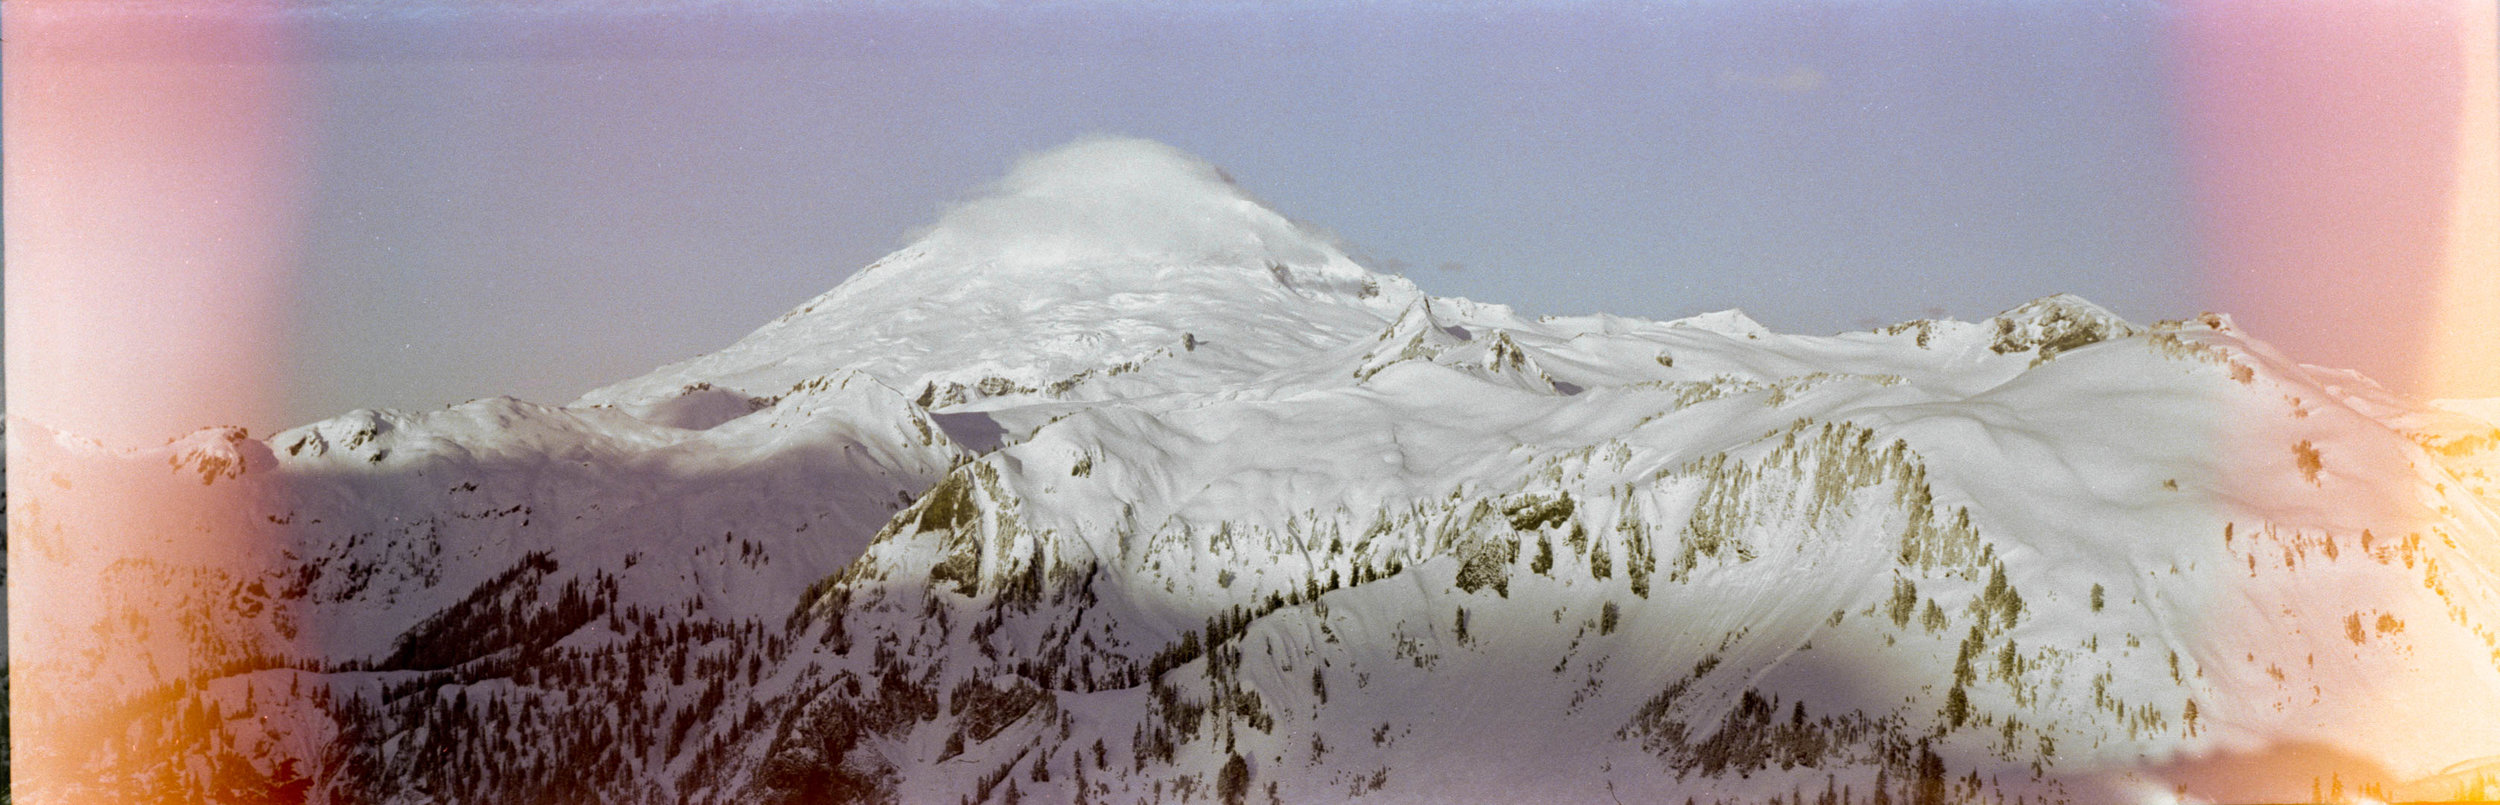
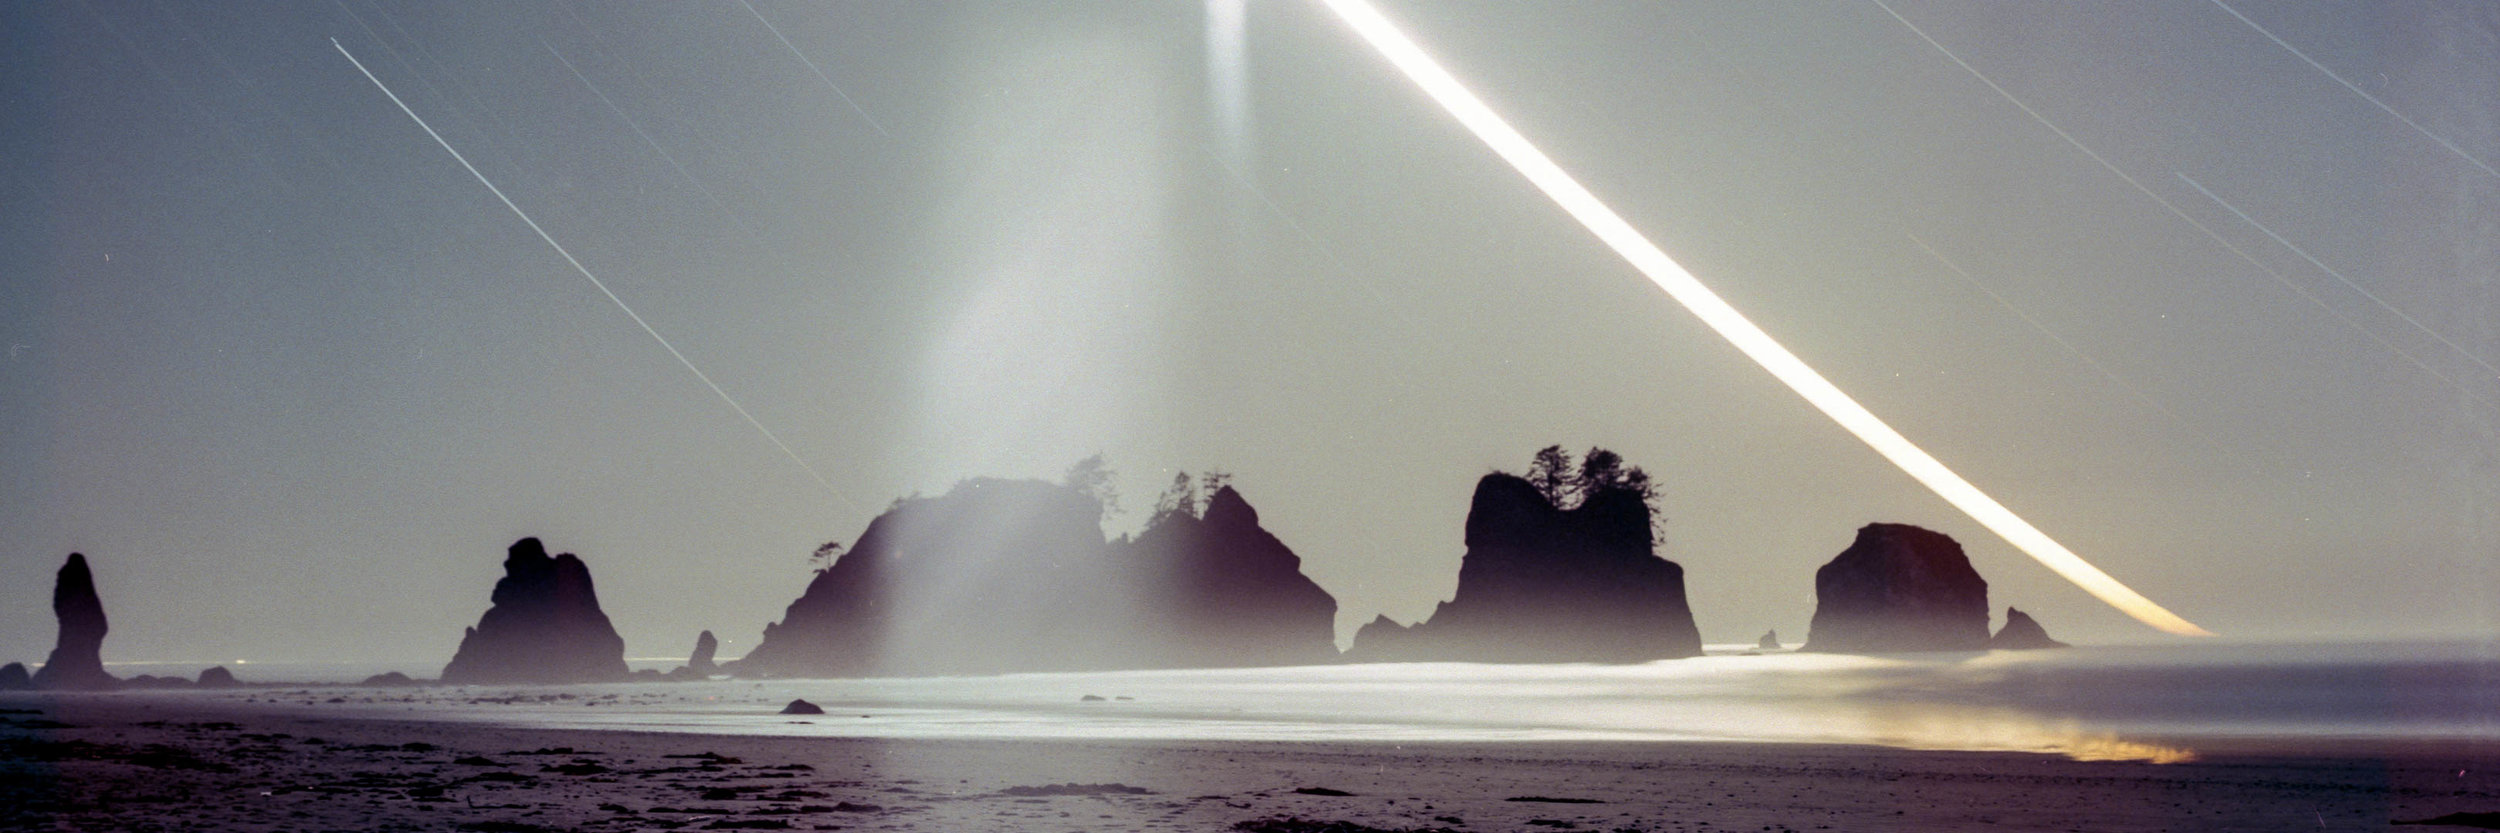
The frames came out pretty well, but with significant light leaks along the edges, presumably from gaps where the corners of the back meets the back of the “lens box.” At this point, I added the top and bottom light seals shown in the .gif above, yet another test roll showed this didn’t entirely solve the problem. Achieving light tightness has been the primary challenge with this project so far.
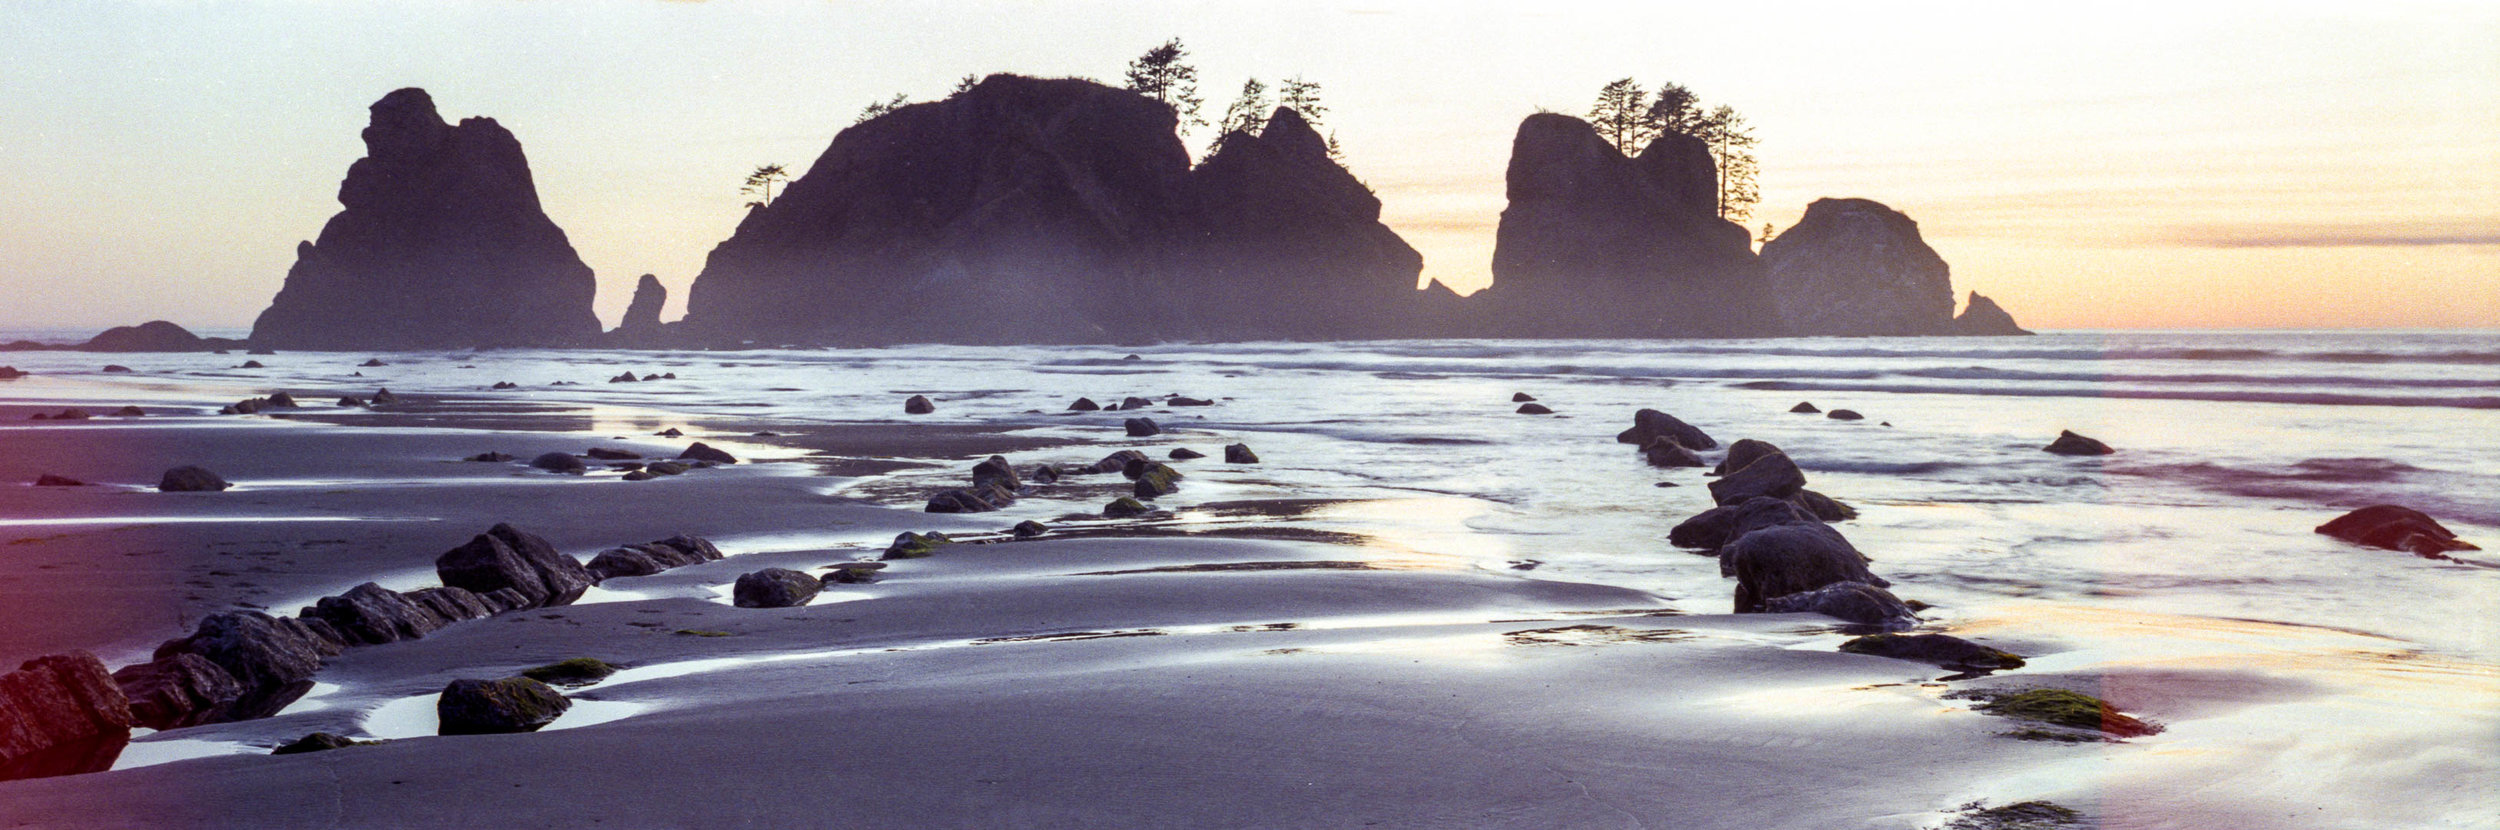
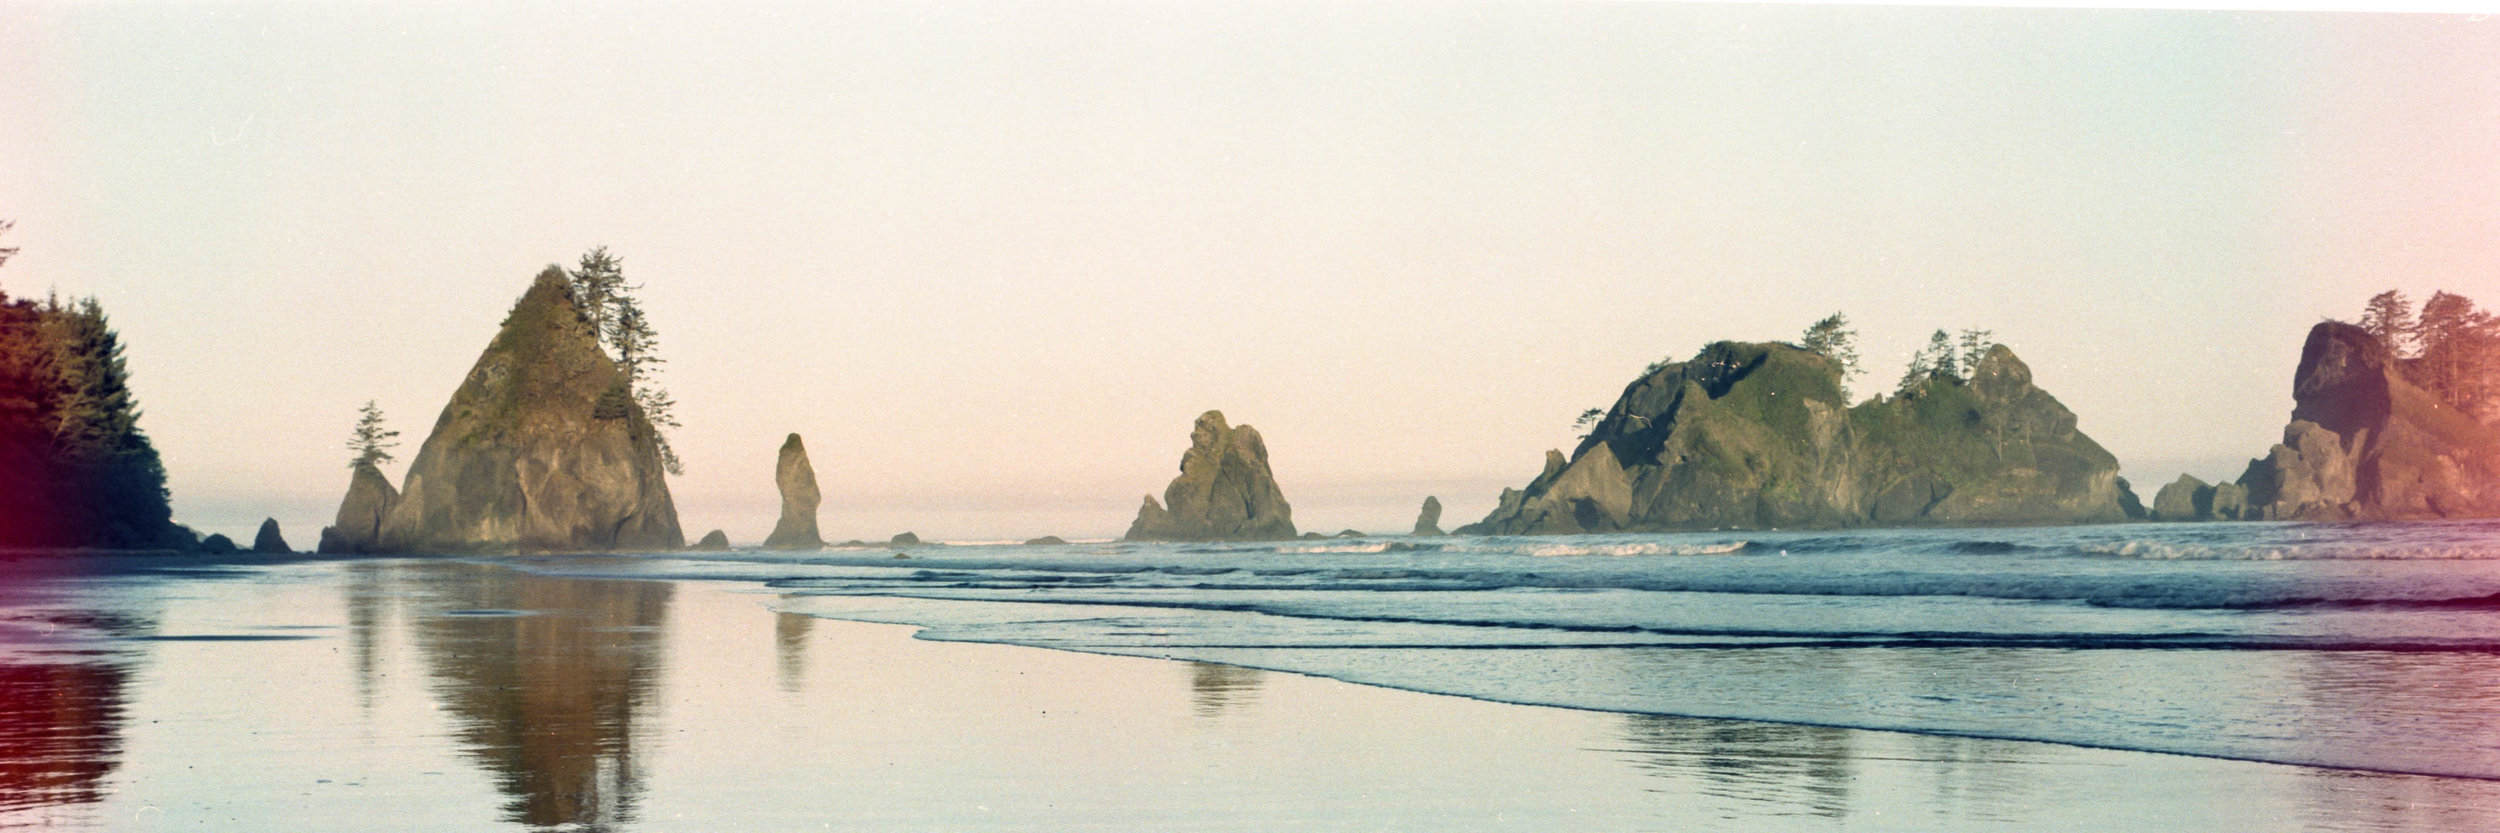
Not one to shy-away from ugly-but-effective solutions, I opted for a simple one - after loading the camera with film, I simply wrapped the whole thing in aluminum foil, leaving a hole for the lens and film winding knobs. While this looks absurd sitting atop my tripod, the four rolls I shot last weekend while camping in the Olympics are much, much better. They’re not perfect, and I need to spend some additional time sealing the lens mount, but I’m optimistic. Here are a few scans of photos from the Olympics, all taken on Kodak Gold and Fujicolor 200.


So far, this project has been an enormous amount of fun to work on, and I’m excited to continue with it! I will be presenting my progress so far at the UW Co-Motion Makerspace mixer this coming Wednesday, May 15, at 5pm.
In the near term, I plan on building a leather case around the camera to help with the last light leaks, adding a viewfinder, staining the plywood, and adding an attachment for a shutter-release.
In the long term, I’d like to re-design the film take-up mechanism to achieve better frame spacing, and build a focusing mechanism that allows me to adjust the focus easily mid-roll.
As always, please reach out with any questions!